Captivate’s biggest weakness in comparsion to Camtasia is the function “Zoom & Pan” – or perhaps not? Today I’m going to show you an interesting idea, how to create a “Zoom & Pan” with Captivate.
This article is also available in German.
Impoprtant Note: This article is adressed to advanced users and assumes basic knowledge in the Adobe Captivate 5 topics Zoomarea, Effects and Panning.
Objective
Before explaining you about the workaround I need to tell you a bit nore about the differences of Captivate’s and Camtasia’s panning functoinally: Captivate’s panning (automatic or manual) is in comparsion to Camtasia very inflexible. You have to define the panning in Captivate during the recording process. So the panning is an inherent part of the recording. In Camtasia you have the opportunity to change zoom and pan after recording. This function in Camtasia is called Smart Focus. But: In Captivate all components are already included to create a zoom and pan. You can use the animation tools to reach a similar result – but it will take some time.
Here you can find an example for my workaround with Captivate:
How I mentioned before it will take some time to carry this workaround out. But it all comes with practice and so it could be very useful for some projects. And maybe it’s going to be easier to use this function with the next version of Adobe Captivate …
Preparations
- Record a demonstration in a (higher) resolution (f.e. 1280 x 1024).
- Export all background images as single images.
- Create a new project in a (lower) resolution (f.e. 960 x 540).
- Import all images of the recording into the library of the new project.

Library - Place each image on a single slide.
- Insert the mouse object on all slides.
You’ve prepared the project. Now you can use the Zoomarea to create a zoom and the Effects panel to create panning.
Insert Zoom
- Reduce an image to the desired size (f.e. 675 x 540).
Hint: Use [SHIFT] to change the image size proportionally.
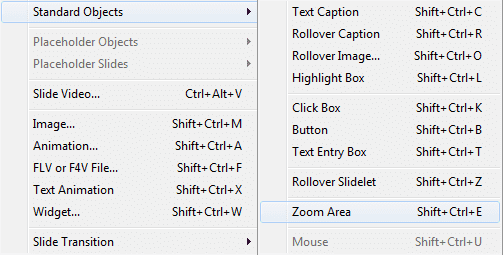
- Insert a Zoomarea.

Inserting a Zoomarea - Zoom to the desired size (f.e. 1280 x 1024).
- Place the magnification to the desired position.
Hint: In the Properties panel of an object you can set the exact values (Position and Size).
Insert Panning
- Start with moving the image on the slide to the desired target position.
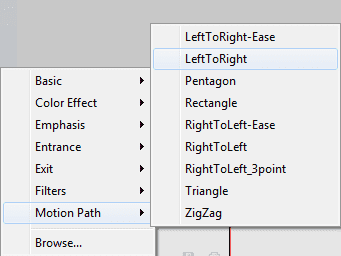
Hint: Set the values in the Position and Size area. - Open the window Effects and create a motion path (Motion Path > LeftToRight).

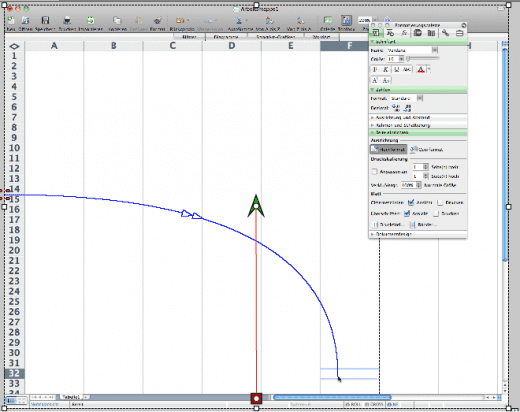
Creating a motion path - Adjust the motion path: The image should move to the desired target position (the green arrow should be in the centre of the image).

Adjusted motion path Hint: Use [Shift] to draw a straight motion path. You can use the drawing tool Line to create straight reference lines and centre the motion path in the middle of the image.
- Move the images of all following slides to the same position (until you insert a new zoom or panning).
An important hint at the end: You can save the motion path as XML. So you’ve just to create one pan for the downward movement and one for the upward movement.
1 Gedanke zu „Perfect Zoom & Panning with Adobe Captivate 5“
Hi, Thank you for this tutorial. I am having problems with step 4. How can I make certian any following image is in the exact same position as as the final position of the image I moved?
Thank you for your help.
Marc